Calendar Clock settings
Calendar Clock is one of the most customizable day clocks available. As the sheer number of features can become intimidating, in this article we demonstrate the app's most important features, including how to use them.
Device status
Each time the Calendar Clock refreshes (which is every 15 minutes by default), the Calendar Clock shares its status with the server. This update contains information about the battery level, battery state (charging, discharging), and app version. Using this information, you can determine whether the Calendar Clock is connected to the server properly, whether it is charging properly, and whether it is on an up-to-date version.
Status notifications
You can choose to receive notifications for this status, by clicking the “Receive important status notifications” button. If you enable this setting, then every time the battery drops below 20% and when the device has not been connected to the server for more than 12 hours, we send you a notification.
The battery level notification is sent once the device updates its battery status with the server. Therefore, you may receive a notification a few minutes after the device reaches 20% battery.
Once every day, our server checks all devices that haven’t connected for between 12 and 36 hours. So you could only get a notification after 24 hours of no connection, rather than immediately after 12 hours.
Screen settings
In the screen settings, you can choose to set:
- Whether to show the menu tab.
- Whether to show a digital clock.
- Whether to show an analog clock.
- Whether to show a second hand in the analog clock.
- The size of the clock compared to the text size.
- Whether to use a 12-hour or 24-hour time format.
- Which language to use.
- Which font to use.
- What the default brightness level is.
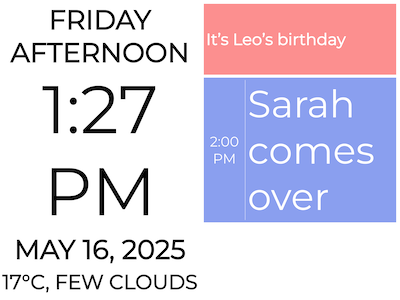
Day overview
The day overview shows next to the clock and shows all messages.
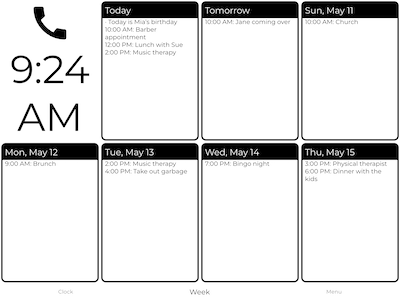
The week overview is a separate page which shows all messages for the coming 7 days.
We notice that often visitors enjoy looking at the week overview as it helps them gain an overview of what is going on in the life of the Calendar Clock owner.
You can set the following settings for the day- and week overview:
- Public holidays - shows the public holidays for a given country as messages.
- Hide future messages - If a message is not yet active, it won’t show in the day overview.
- Hide passed messages - If a message was supposed to show between 12:00-13:00 and it is 14:00, then this message won’t show in the overview.
- Hide old tasks - If a task has been confirmed, then this message won't show in the overview.
- Day names - You can select how the days in the overviews are shown. For instance, where some people like seeing "tomorrow", some like seeing the date of tomorrow instead.
You can also customise the day overview in specific. You can set up:
- How many days to show in the day overview.
- How many messages to show in a single page in the day overview.
- Whether to show the start times of messages.
- Whether to show the end times of messages.
- Whether to automatically highlight a currently active message or the next upcoming message.
- Whether to blur messages that have already ended.
Day description
In the day description settings, you can choose what information to show about the day. You can choose to display/hide:
- The weekday.
- The part of day.
- The date.
- The year.
Moreover, you can choose whether you want to show this day information IN ALL CAPS or not.
Lastly, if you show the part of day, you can set up the times between this time of day is active. For instance, you can set up that the evening starts at 18:00 and that the night starts at 23:00.
Sound settings
The sound settings contain several settings for related to sounds and alarms. There are the following settings:
- The default volume.
- Alarm sound - choose from a range of alarm sounds. Otherwise, the default “piano alarm” is used as an alarm sound.
- Stop alarms after - choose how long the alarm should be visible on the screen before automatically dismissing. This prevents alarms from ringing for hours and hours.
You can also select chimes in your screen settings. In this setting you can choose between 6 options:
- No chimes
- Big Ben Chimes - hours long. You will first hear a Big Ben chime every hour and then the number of hours by chimes (so at 15:00 it rings three times).
- Big Ben Chimes - hours short. Just like Big Ben Chimes - hours long, but also with a chime every half hour.
- Hours long. You will hear the number of hours by chimes every hour (so at 15:00 it rings three times).
- Hours long - half hours. Just like Hours long, but also with a chime every half hour.
- Hours short. You will hear one chime every hour (so at 15:00 it rings a single time).
- Hours short - half hours. Just like Hours short, but also with a chime every half hour.
Synchronize settings
The synchronize settings contain several settings for loading messages and settings. There are the following settings:
- Automatically delete expired messages - executes a script daily that deletes all old messages (messages that will never be shown again in the future). This helps the app stay “clean”.
- Refresh new messages and settings every - choose how often the Calendar Clock loads settings and messages from the server;
- Import agenda from iCal file - import all messages from an exported iCal file from your calendar application into Calendar Clock. If this import does not work properly, please contact us!
- Sync with online calendar - automatically load all messages from an online calendar. This is a one-way sync, so from the online calendar to Calendar Clock and not in reverse. We wrote an article on how to set up an online calendar connection for iCloud and Google Calendar. If this syncing does not work properly, please contact us!
- Copy messages from another device - one-time import of all messages from another Calendar Clock into this Calendar Clock. This only works if you have at least two Calendar Clocks connected to your administrator application. This option can be useful if you switch from one device to another device and want to transfer all your data.
- Copy settings from another device - one-time import of all settings from another Calendar Clock into this Calendar Clock. This only works if you have at least two Calendar Clocks connected to your administrator application. This option can be useful if you switch from one device to another device and want to transfer all your data.
- Sync with another device - make this Calendar Clock a copy of another Calendar Clock device. Using this setting, all settings and messages of the other Calendar Clock will also be used on this Calendar Clock. This option can be useful if you have multiple Calendar Clocks in different parts of the house and want them to synchronize.
Color settings
In the color settings, you can choose which colors to show. More importantly, you can also choose to display different colors between certain hours of the day. For instance, you can choose to use black and white as colors during the day and then select the “alternative colors” setting to use red-white buttons during the night.
Lastly, whole day messages and non-whole day messages display in the day overview in different colors which can be customized.
Night mode settings
To save battery during the night and to keep the peace at night, we added a night mode to Calendar Clock. If you choose to enable the night mode, you can indicate between which hours of the day the night mode should be active. During these hours:
- The brightness is set to a minimum;
- Alarms and hourly chimes do not play;
- The app stops refreshing.
There is an additional option for the night mode, where one can choose whether to have a clock and date displayed during the night mode. This way, those who have their Calendar Clock in the room in which they sleep can still dimly see the time. If you do not enable this feature, the Calendar Clock will show a completely black screen.
Photo settings (Premium only)
The photo settings can be used to set up a photo carousel on the Calendar Clock device. You can choose from photos on your phone and these photos are then uploaded onto our server. The photos automatically alternate on the Calendar Clock every 60 seconds. If you want to skip to the next photo, you can click on the photo. You can also set up that if you click the photo, it makes it full-screen for a short period.
By default, the photo carousel displays at the same size as the day overview. If you wish to customise this, you can do this in these settings.
Weather settings (Premium only)
The weather settings can be used to show the current weather and wind speed in a given location. You can choose to display the temperature in either Celsius or Fahrenheit and can choose to show the wind speed in mph or m/s.
Video call settings (Premium only)
The video call settings contain several settings regarding video calling. First, video calling should be enabled in order for the video calling to work. Activating the video calling on the Calendar Clock requires the Calendar Clock to refresh. Only then will it start listening for incoming calls. Please ensure the Calendar Clock is open to receive incoming calls!
All administrators with Premium can video call a Calendar Clock. Once you video call a Calendar Clock, the device makes a loud ringing sound and shows a large red video calling icon. Depending on your chosen settings, the device will either pick up the call automatically or display an accept/reject button.
After connecting, the Calendar Clock will use the input devices shown in the video call settings during the call. By default, the selfie camera and speakerphone are used.
If you also want the Calendar Clock to be able to call you, you can add yourself as a contact person. Once done, a call icon will appear next to the date on the Calendar Clock, and you can use it to initiate a call. Whereas the Calendar Clock should be open for it to receive incoming calls, administrators receive calls just like any other video calling application. So it shows a big notification and makes a calling sound, independent of whether you have the app open or not. Therefore, make sure that you give the app permission to send notifications!
If you have multiple contact persons, after pressing the call icon, the faces and names of the contact persons are shown, and they can be pressed to call that person.